After falling from the sky, the Knight remains unconscious. The Princess is dragging him through the forest away while running from a group of goblins seeking to eat them. They catch up to her, and she dramatically throws a stone at them and runs away in order to lure them away from the Knight in his helpless state.
The Knight wakes up and looks around and we’re given control to follow the Princess. Heading down, the Princess can be seen running away from the goblins. While following her, some vines will appear around the Knight and two Lv.1 Goblin Thieves ambush us. After defeating them you can continue down where you will see the princess jump over some rocks while running from the goblins, which for some reason the Knight cannot do, leaving us to find another way to follow.
At this point a creepy smiling girl will appear from the west and watch you, but she won’t talk to you because you’re “busy” trying to find a way around the rocks. You can continue down, and you will notice the girl following you. Continue to the right and you will find a fire pot on the ground with one lit and two unlit torches. Pick up the fire pot and light it by standing near the lit torch, then stand near the other two torches to light them which will unblock the path.
Follow the path and you will find a treasure chest surrounded with signs. Use a fire pot to light the signs, and open the chest to find the Mole Glove inside, which will allow you break rocks like the ones that the Princess jumped over.
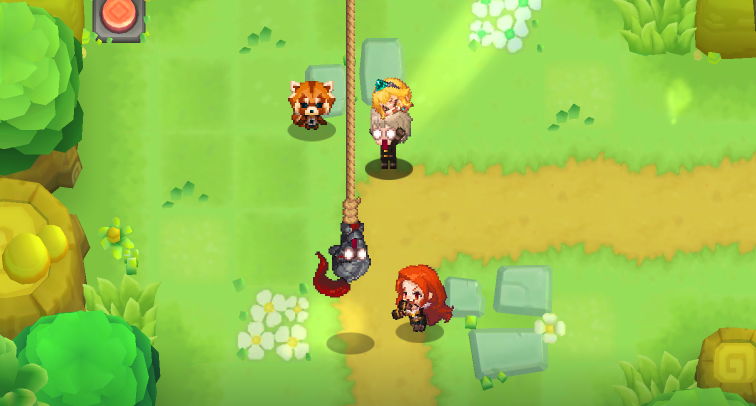
Break the rocks to the left to get past them, and then go up, ignoring the goblins on the ground, and you will see the Princess on the ground seemingly unconscious. As you try to approach her, you trigger a trap that dangles you in the air upside down on a rope. As you’re hanging, three people will approach you: a red panda, red haired woman and silver haired man named “Danny”. Danny grabs the Princess and the woman mentions that there is a bounty of 3,000,000 gold for the Princess. You are given several choices on what to say, but regardless of which one you pick the mercenaries will take the princess with them and leave you hanging.
While hanging, you can tap on the screen or just wait a few seconds. Innkeeper Loraine will eventually come and release you from the trap. She asks you why you were in the trap, and you explain that the Princess was taken away. Loraine offers to help you find her and joins your party. If you follow the path and defeat the group of monsters with the Lv.1 Goblin at the end of the path, you can exit the stage, unlocking Kanterbury Forest Passage 1.
Collectibles
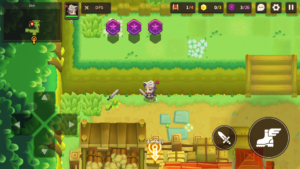
As soon as you gain control of the Knight in the beginning of the stage, you can see a Lv.1 Iron Shield behind two boxes in the bottom right corner. You can simply pick up the boxes to gain access to it. If you head north behind the Inn, collecting the three purple coins (3) along the way, you will find a Lv.2 Tutorial Sword behind the inn all the way to the left. Before heading back down, you can collect another three purple coins (6) up the stairs.
Upon heading down from the first area to follow the princess, defeating the two goblins that ambush you will reward you with 2 more purple coins (8).
Heading back to the right, then down from there, you will find two more purple coins (10) where the road turns to the east. Follow the road east where the three torches are and pick up the two purple coins (12).
Continuing to the right and then up to where you found the Mole Glove, head to the right and pick up the 2 purple coins (14). Push the block at the top that’s blocking a cave and proceed to go in. Avoid the spike traps by walking around them and you will come to a room where you have to fight four Lv.1 Slimes.
After defeating them, continue to the left and then down and you will exit the cave to find two purple coins (16) and a star piece (1). Go down the stairs to the left and then head up the stairs to get two purple coins (18) as you go to the next screen, back to the original entrance of the cave.
From here there is a secret passage along the bottom wall going down where you can find a star piece (2) surrounded by bushes which you can pick up and throw away.
Find one of the lit fire pots and bring it with you. Break the rocks to the left of the chest where you found the Mole Gloves, and then go past the goblins on the ground, breaking more rocks, to get to 2 more purple coins (20) and a star piece (3).
Continue even further to the left, and you will be back where Loraine first appeared. Go one map to the left to find two purple coins (22).
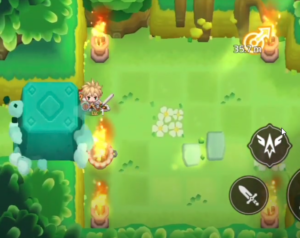
Light the four torches with the fire pot to lower the block to the left, allowing you to pass and pick up the Heavy Armor Knight costume.
Head back to the right, and up one map to where you were first ambushed. You can break the rocks here and head left then up, picking up two purple coins (24) along the way, to see someone run off dropping behind a map which unlocks the Secret Forest Stage.
Backtrack to the exit of the stage, which is to the right of where you were hanging from a rope, there are two purple coins (26) right at the exit.